
You’re set up — now give each account a room
One click to switch, one closed tab to forget. Here is the whole flow.
-
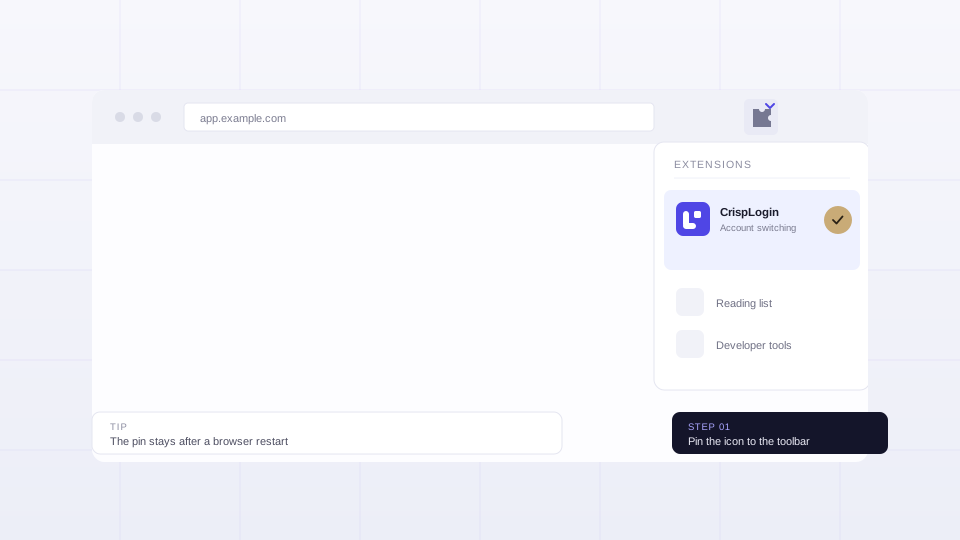
Pin CrispLogin to the toolbar
Click the puzzle-piece icon at the right of Chrome’s address bar, then the pin next to CrispLogin. The icon stays on the toolbar from then on — one click away, instead of buried in the extensions menu.
-
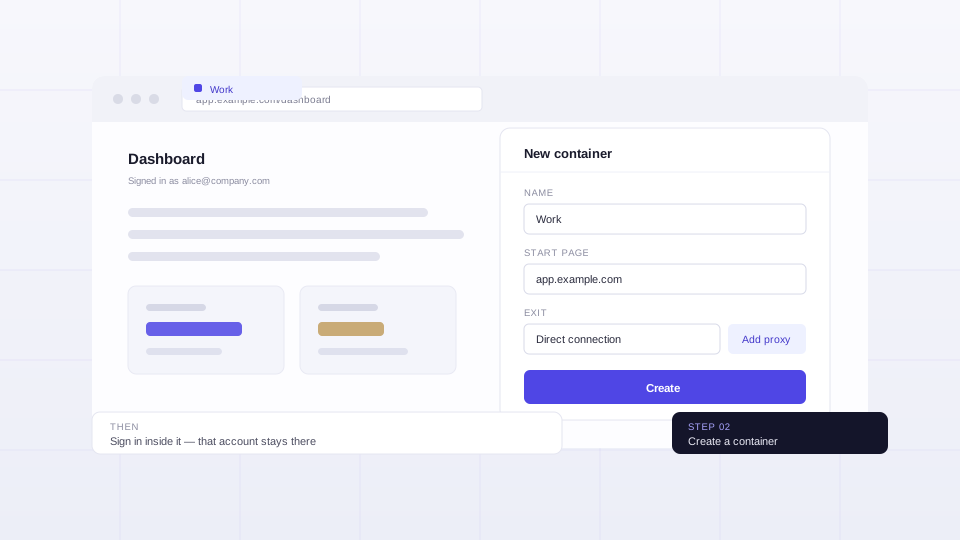
Create a container and sign in there
Click the icon, then “New container”. Give it a name, a start address and — if you like — a proxy. Everything you sign into inside that container stays in that container: cookies, localStorage, IndexedDB and cache are all namespaced.
-
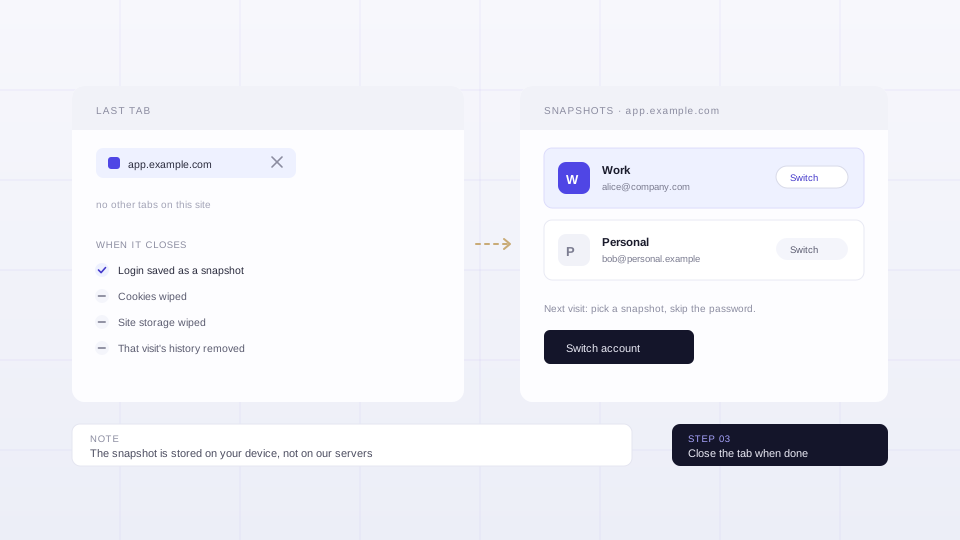
Close the tab when you are done
For a managed site, closing the last tab saves the login as a snapshot and wipes the cookies, storage and history of that visit. Next time, pick the snapshot and you are back in without typing a password.
Want the account to come back on its own?
Mark a snapshot as the one to use for a domain, and the page opens already signed in. The free plan keeps one custom container; PRO removes that limit and adds a user-agent identity per container, PAC and Clash proxies, and carrying state between containers.
Stuck on something?
Activation, device limits, refunds, and what happens when you cancel are all covered in the FAQ.